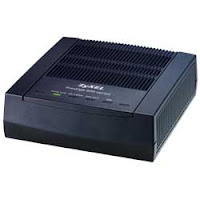
 Ok I'm gonna get right to the point here. In case you didn't know the Embarq 660R is both a router and a firewall. Router to router equals hell on port forwarding. I also want to say if this does effect you just leave it alone. The Embarq and the router will co-exist for the most part but you will have a slight network slow down. I found this issue when I was trying to open up a port for XLink Kai to link Xbox's and stumbled upon why it wasn't working right after I purchased a new router (I also bricked my old one but that isn't important lol). I must also say though this worked for me I can't accept any responsibility for what happens to you but I will be glad to help as much as I can.
What we are going to be doing is setting the router to just be a wireless access point/hub and letting the Embarq do the DHCP address assigning and routing. (Note: There is another way to do this by turning the Embarq into a bridge and then setting up your router for PPoe connection but then you have to call Emarq to get all your username information in order to sign in which I didn't feel like doing at 1:00 in the morning).
Step 1: You need to log into the web interface of the router. to do that you need to type in the IP address of your router into your Web Browser (IE, Mozilla, Netscape, Opera, etc...)
(Note: If you do not know the User Name and password of your router you are gonna need to either reset your router or give that company a call. The generic login was "admin" as the username with no password for my D-Link and Linksys default username is "administrator" and the password is "admin")
To get the IP address :
(Vista)-
1. Window Button
2.Type "CMD" in the Instant Search
3. Press Enter
4. Type "ipconfig"
5. Press Enter
6. The Gateway Address is the address of the router normally
(NT/2K/XP) -
1. Start
2. Run
3. Type "CMD"
4. Press Enter
5. Type "ipconfig"
6. Press Enter
7. The Gateway Address is the address of the router normally.
(NT/2K/XP) -
1. Start
2. Run
3. Type "Winipcfg"
4. The Gateway Address is the address of the router normally.
(Mac OSX)-
1. Open System Preferences
2. Click "Network"
3. Select your network type (Airport or Ethernet)
4. Click "TCP/IP" button
5. Router Address
(Linux/UNIX)-
1. Open a terminal window
2. Type "ifconfig -a"
3. Press Enter
4. If I remember correctly the "Bcast" should be the router IP
Step 2: Once you log in you need to view the IP address of the Embarq router your wireless router is connecting to or in other words, the WAN settings.
(Note: In the case of the D-Link and Linksys I just went to the "Status" tab and the WAN IP address was listed including the server. It should be 192.168.2.1 or at least it was for me.)
Step 3: Set your router to be an assess point. (In my case for a D-Link WBR 2310 I simply logged in and a check box was on the home screen)
Step 4: Restart your computer and make sure you can still see the internet. (If you already know how to renew your DHCP address you can simply do that but I didn't know how for all the OS's so I gave you the easiest) (Note: If your computer has a static or hard set IP address you will need to change it to a DHCP. Most computers should already be set to DHCP unless you have a network admin in which case he/she should be doing this anyway. Hopefully you already know how to do this but if not just take a look at the support forums for which ever OS you have.)
Step 5: Find your computer's new IP address using the procedure from Step 1. (You will need this address to know where to forward the port or ports to.)
Step 6: Log in to the Embarq modem by typing in the address in to your browser that you got from your router.
(Note: The initial password should already be typed in so just press enter again to log in. The next screen has you assign a password of your choosing.)
I want to warn you that in my case I had to log in over and over again. If after any selection you make you get a login window, it didn't hold the setting. Just warning you!!
Step 7: On the main ZyXel screen select NAT.
Step 8: Type in the port forwarding information and make sure to type in the correct IP address of the computer you want to forward to and click "Save Settings". (Once again if the login window comes up it DID NOT ACCEPT YOUR CHANGES!!! and you must do it again.)
Step 9: Test that app or device out!!


No comments:
Post a Comment